Application Settings
Define the settings that apply to your organization after authentication.
Once authentication is complete, the next step is to define the settings that apply to your organization.
Navigate to Settings
- Navigate to the Proff Connect application.
- Open the Settings tab under General Setup.
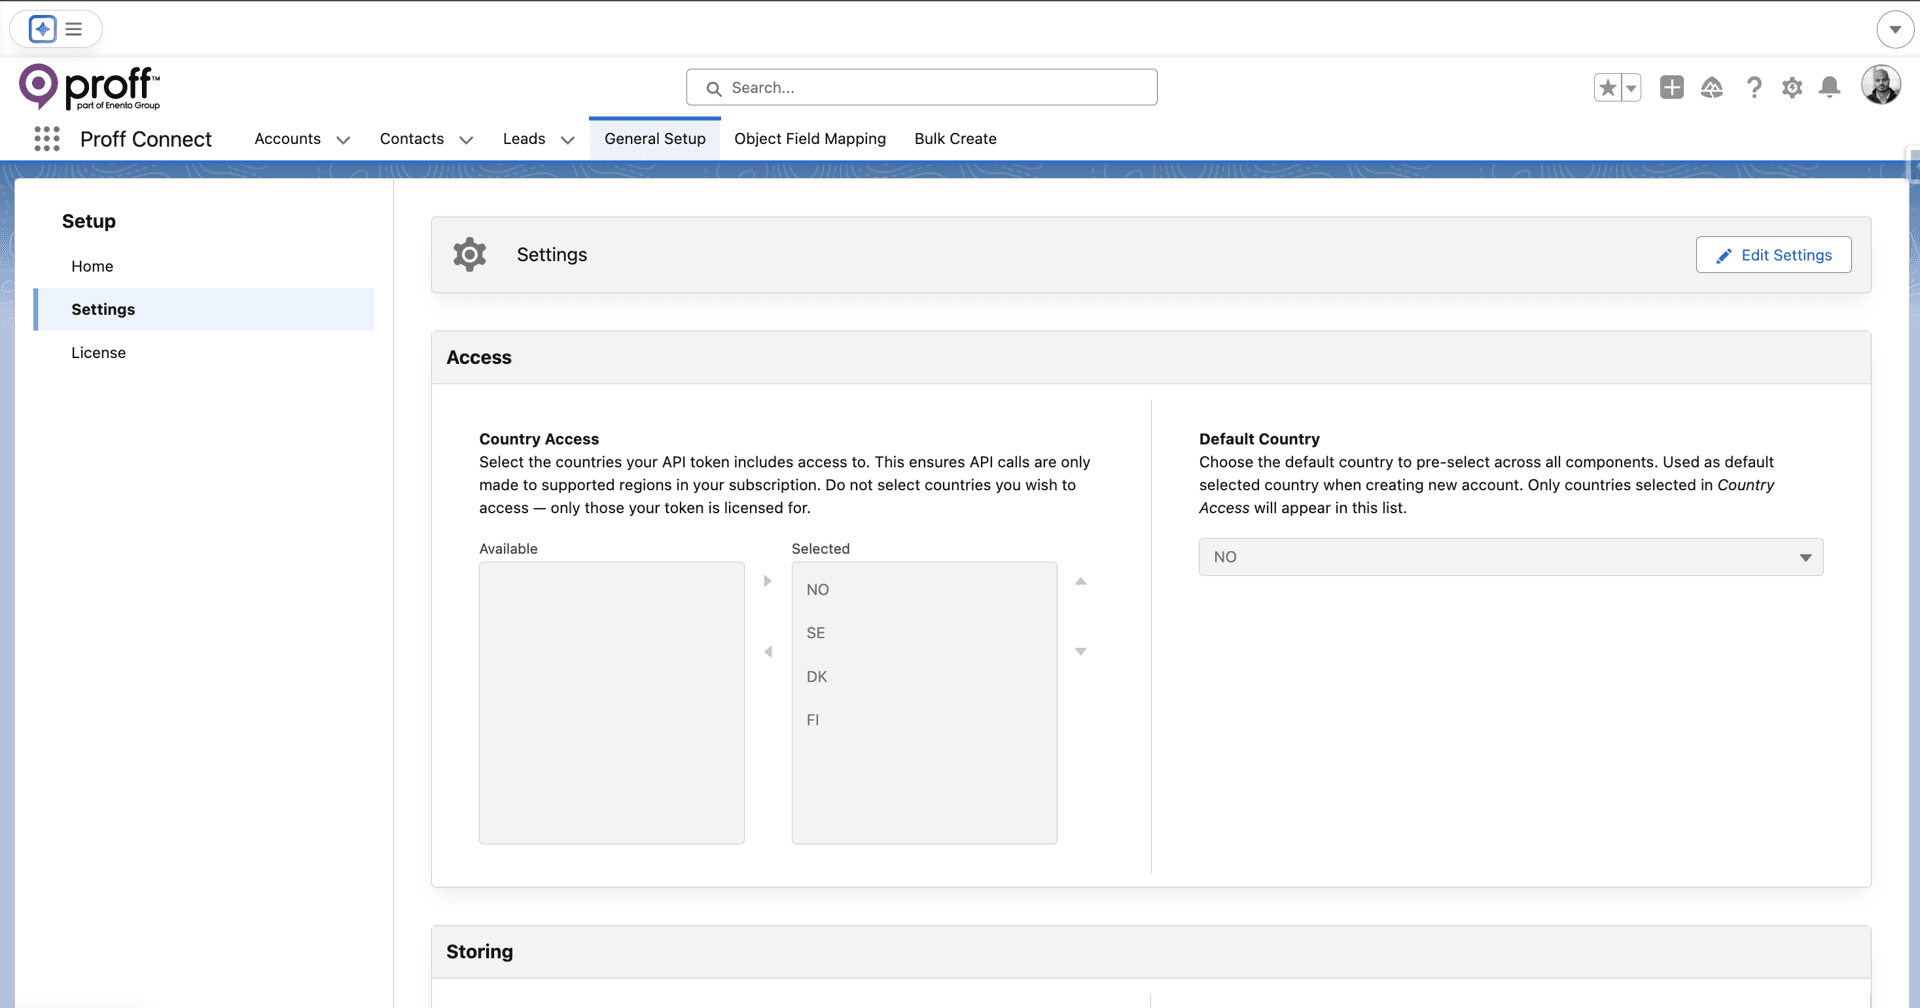
The Settings page is divided into three sections: Access, Storing, and Bulk Create.
1. Access
This section controls which countries and default options are available in the application.
Country Access
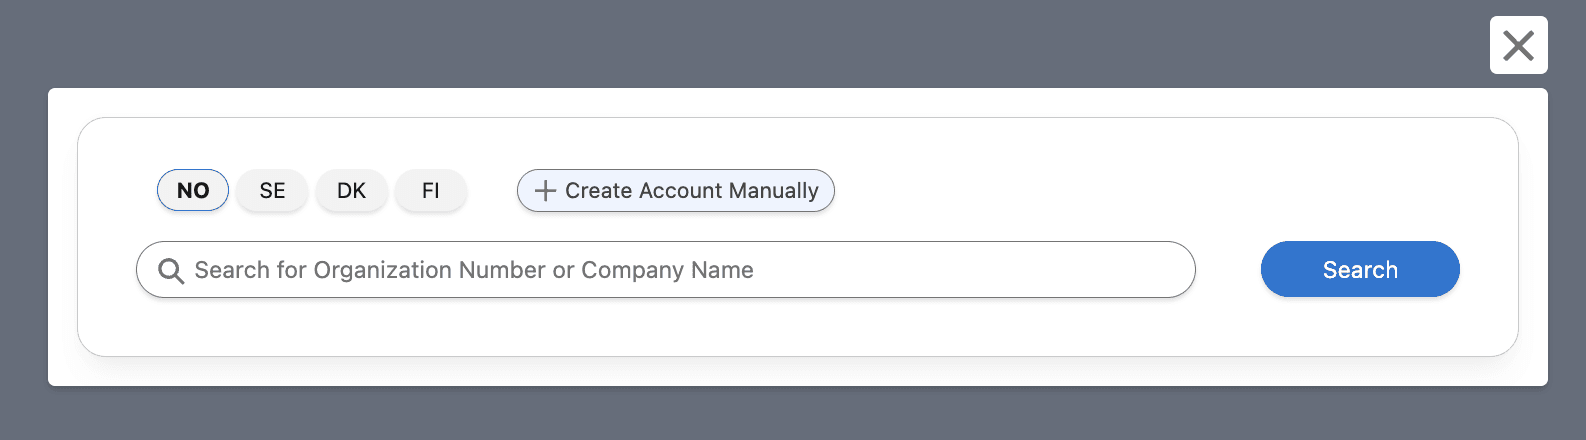
Add the countries that the application should have access to (currently supported: NO, DK, SE, FI).
Important
The API token must include access to the selected countries.
Default Country
Defines the default country value when using the New Account Lightning Web Component. You can only choose from countries included in Country Access.
Note
The API token must include access to the selected countries. If you need access to additional countries, please contact Proff at api@proff.no to extend your API access.
2. Storing
This section defines how Company Insight and Contact Insight data should be handled and stored in Salesforce.
Available Storing Options
| Option | Description |
|---|---|
| Always Store | Automatically stores Company Insight and Contact Insight data in related custom objects whenever you create or sync an Account/Contact. |
| Store on Demand | Data is not stored during creation, but can be retrieved on demand after record creation, with the option to store later. |
For more details, see Company Insight on Demand and Contact Insight.
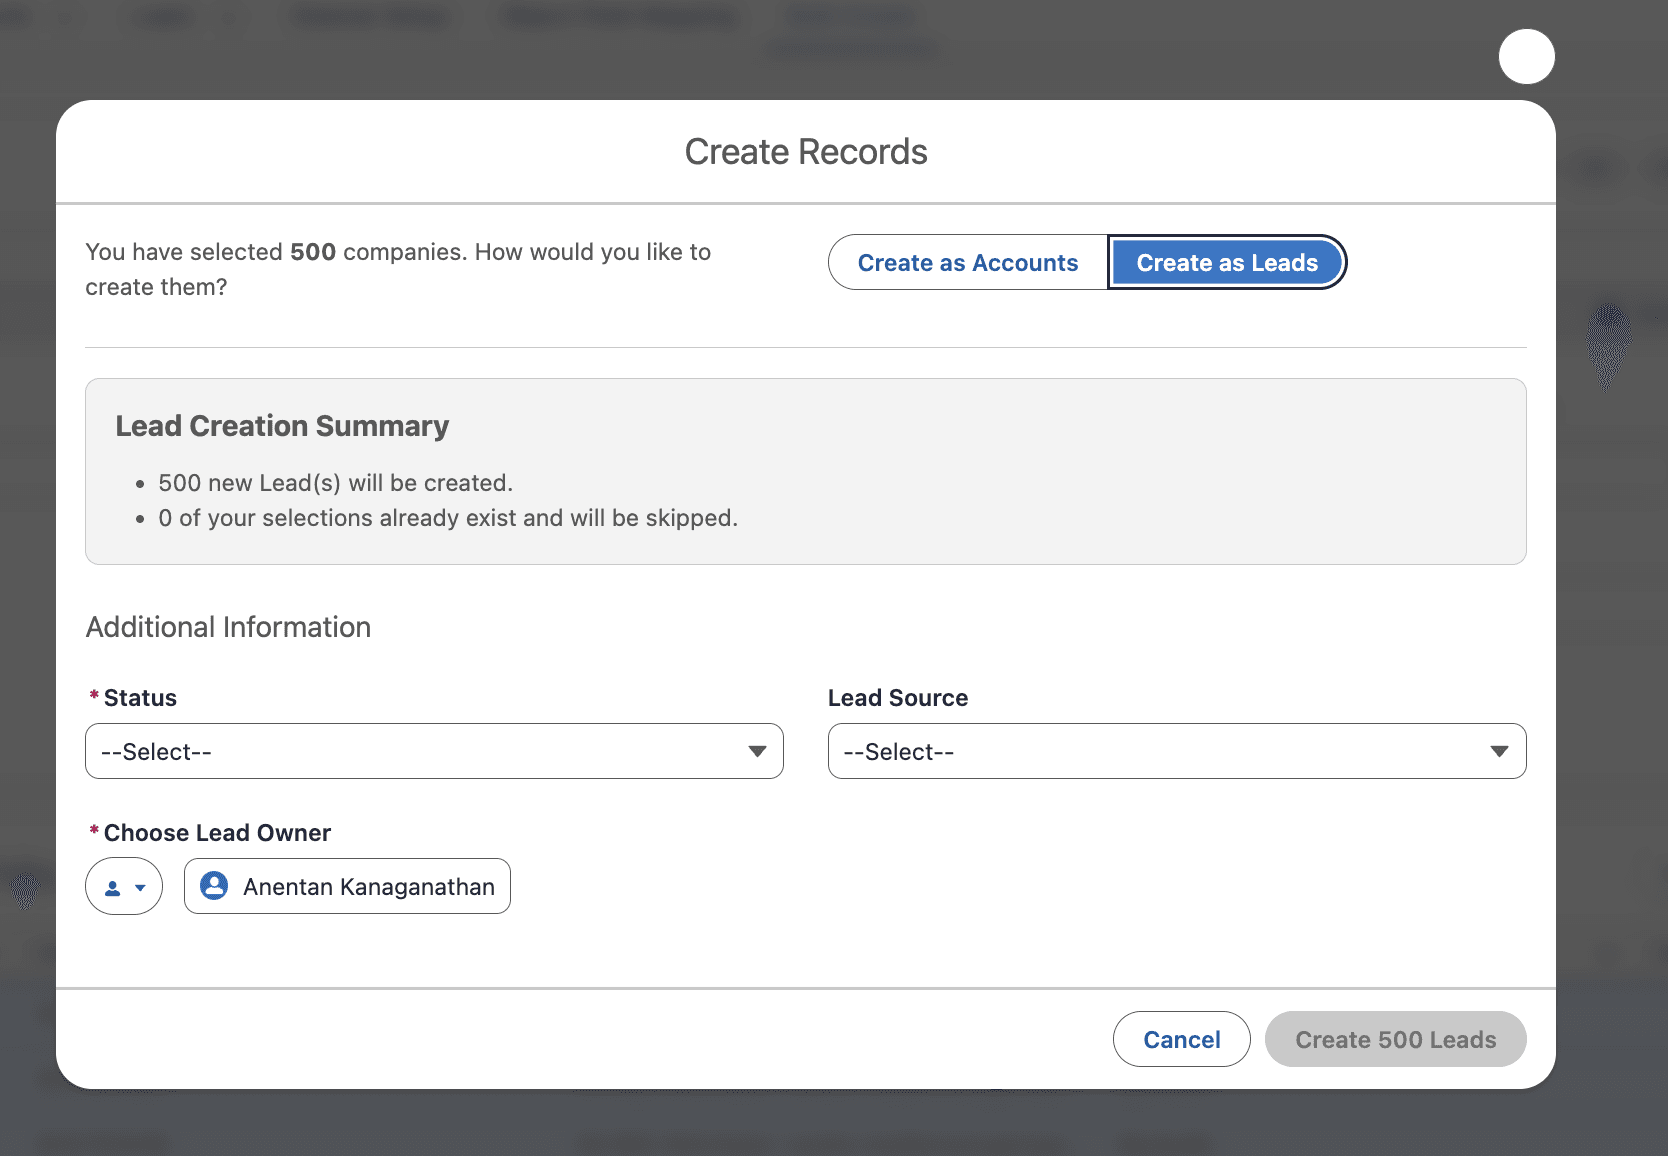
3. Bulk Create
This section explains how Field Sets control which fields are shown to users during the Bulk Create process for Accounts or Leads.
Field Sets allow you to present specific fields to users before records are created, ensuring that required or important values are populated correctly.
Field Set Naming Format
The Field Set name must use a unique API name, for example:
Account_Proff_Field_SetLead_Proff_Field_Set
This API name is later referenced in the Bulk Create configuration.
Why Use Field Sets for Bulk Create?
By adding a Field Set to Bulk Create, users can view and populate selected fields before records are generated. Common use cases include:
- Lead Queue Assignment — Allow users to select or predefine values so Leads are automatically assigned to a specific queue upon creation.
- Source & Campaign Tagging — Enable users to set values such as Lead Source or Campaign, making it clear that the records were created using the Proff Connect Bulk tool.
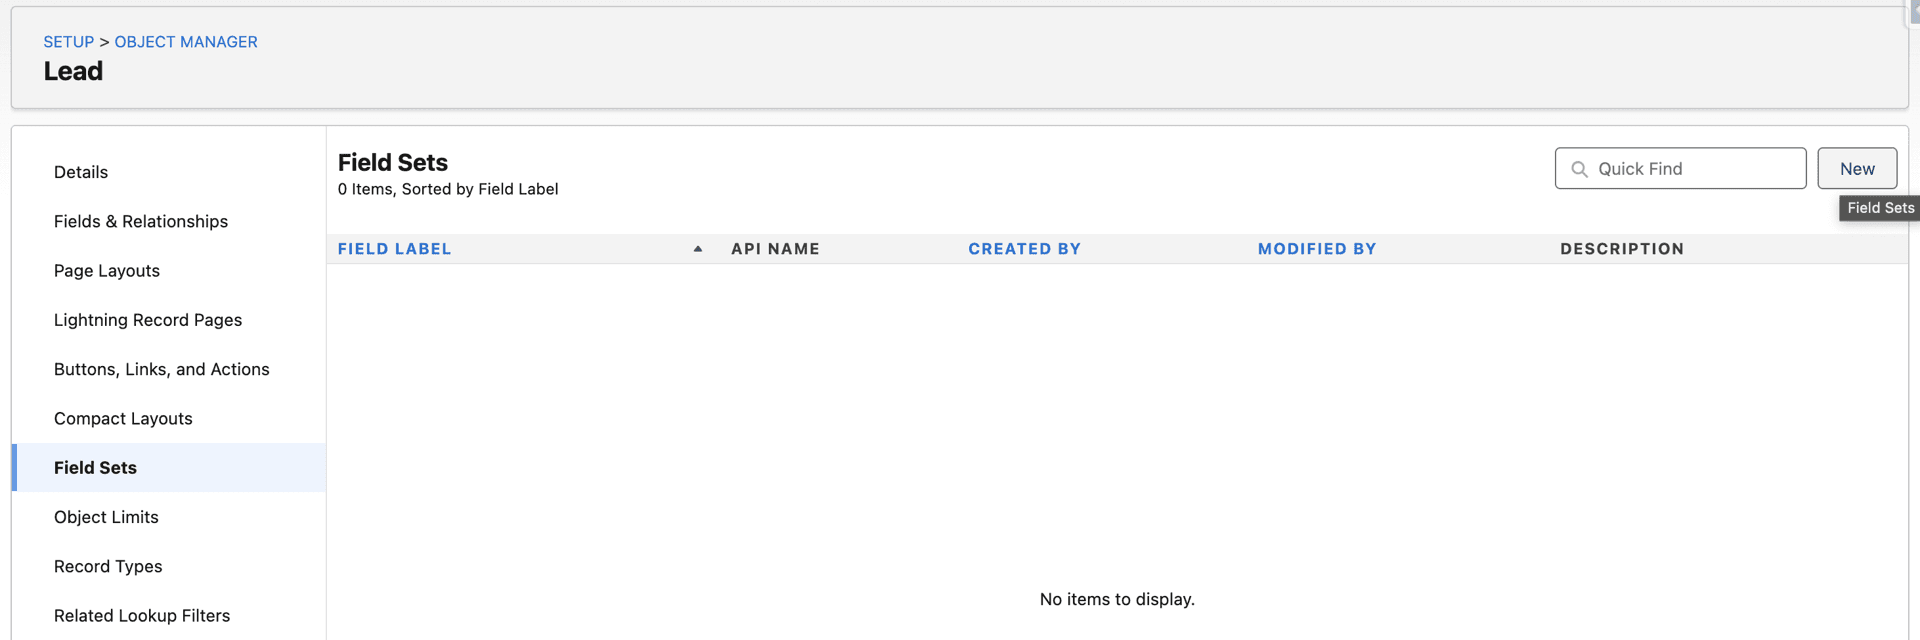
How to Create a Field Set
- Navigate to Setup → Object Manager
- Select Account or Lead
- Click Field Sets in the left sidebar
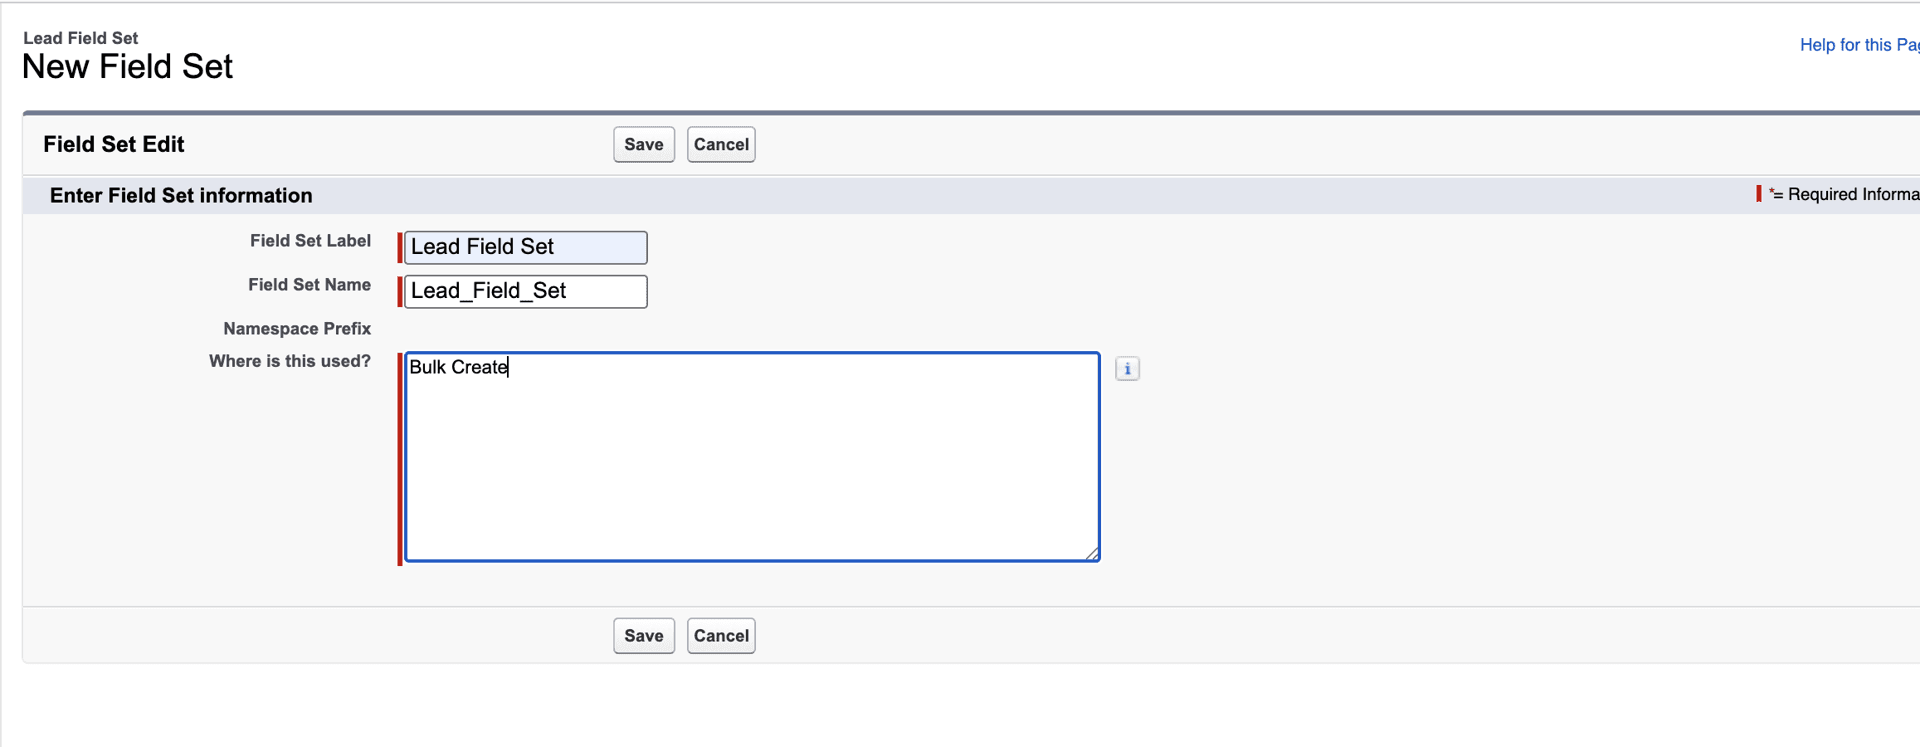
- Click New, give the Field Set a meaningful name, and click Save
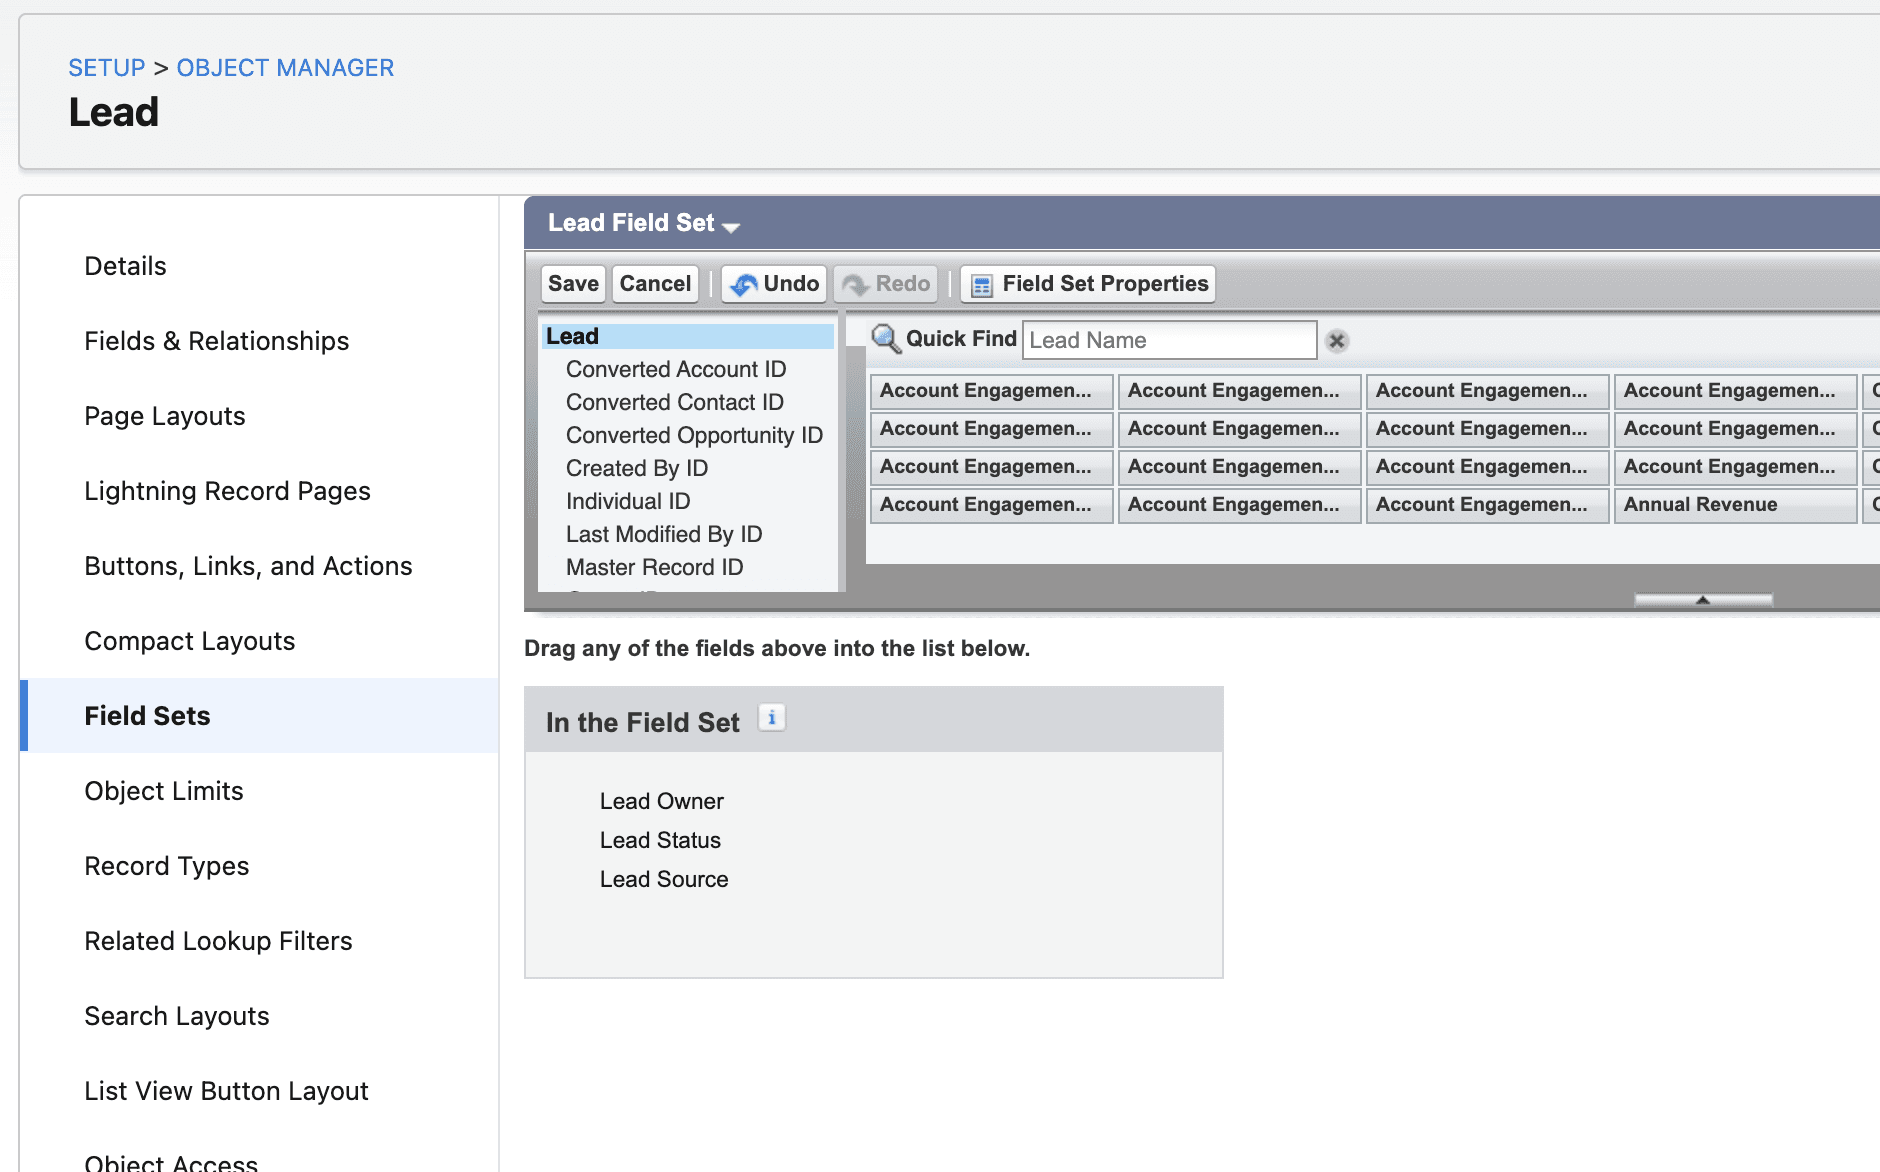
- Drag the desired fields into the Field Set and click Save

- Copy the API Name of the Field Set

- Go to General Setup → Settings → Bulk Create and paste the API name into the configuration
Result
The selected fields will now appear in the Bulk Create component, allowing users to populate them before records are created.
Important
Before enabling Bulk Create: review required fields, check validation rules that enforce values on creation, and ensure that all required fields and validation-dependent fields are included in the Field Set, so users can provide the necessary values before records are created. Failing to do this may cause record creation to fail or result in a poor user experience.
4. Languages
Proff Connect supports multiple languages across the whole solution. Norwegian and other supported languages are available for labels and UI text throughout the app — including the Job Center, Lightning components, settings, and object/field names in list views, record detail, and reports.
Translation Workbench (or your org’s equivalent) must be enabled for these translations to apply. Users can then select their language in Salesforce, and the Proff Connect UI will follow that choice where translations exist.
By configuring these settings, you define how Proff Connect behaves across your Salesforce org and ensure alignment with your organization's requirements.
Was this article helpful?